Back to Basics (and a bit of balyage too)

I bit the bullet and went into my hair dressers last week. The re-growth situation was out of control and Mumma Sparrow let slip at her appointment that I was considering chocolate brown and my hairdresser suggested I come in straight away for a consult before making any major colour changes.

And boy am I glad I did!

I always try to arrive early for my hairdressing appointments, just to make sure I’ve given my stylists all the time I can to get my hair right. I’m also one of those people who prefers to be super early for something than running late, and usually I need to take my hair out of its bun/pony tail/braid and brush it out before my appointment starts.

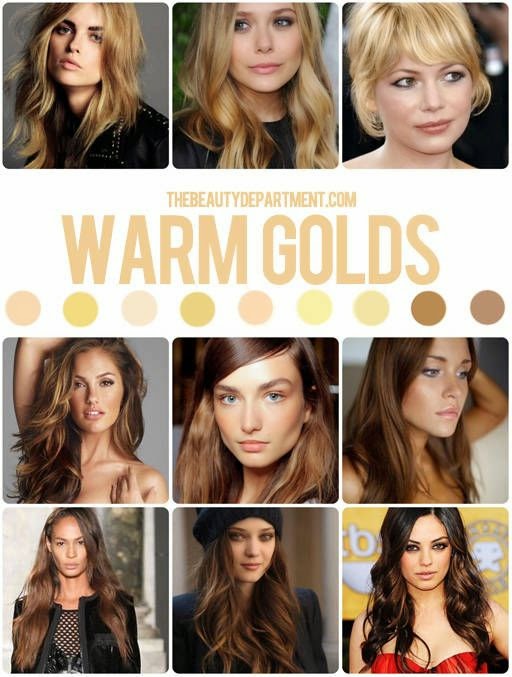
The colour wheel I'm sticking with


Baby Sparrow - natural colour!
I sat in the chair (same one as last time I think?) and got a good look at all the colours available in the Nak soft colour range. Re-growth is a real pain for anyone, but I’ve reached my point over the last few months where as much as I love my blonde, and I love being a light, almost platinum blonde, I can't deal with REGROWTH. OH MY GOD. NO. Over it, so, so over it. I’ve been doing a lot of soul searching (oh that sounds really douchey, I’m sorry) the last few months and it’s lead me to wanting to be as honest with myself as I can and, funny as it sounds, I want to get back to something like my natural colour, something I haven’t seen in, oh, about five years?


This time around a different team member took my appointment and I’ve got to say, he’s brilliant. All of the team are, and no matter who does my colour it always comes out looking superb, but the end result was so, so perfect, I couldn’t be happier. The base/root colour was a mix of 6.7 and 7.7 with 10 Vol, worked down and painted by hand. The light, almost white blonde my gorgeous girl Prue perfected during the pink period was left alone, and became the ombré tips to the darker shade.


The other wonderful thing about ditching the blonde foils and highlights is the time is cut in half! Anyone who’s ever had their hair colour treated or lightened to blonde will tell you that about three magazine’s worth of time is taken up with waiting, waiting… waiting…
This time around I was sitting only for about half an hour, forty minutes, before I was taken up to wash.

While my colour was being done my hairdresser and I had a good chat about life, relationships, and of course, hair. I was a little concerned about my colour, simply because I’ve done a lot to my hair over the last six months, but he reassured me that going darker would look great, but also wouldn’t do any more damage. I’d mentioned earlier on the blog that I’ve got very, very thick hair, and that has been my saving grace throughout all my colour changes. Whilst he had noticed some breakage, my stylist reassured me that my hair was ok, and would recover. He also talked about how porous some hair can be, and that I’m lucky mine isn’t too much so. The big problem with taking your hair down from a bleach-blonde shade to anything remotely darker is that your hair can turn green. Depending on how porous the hair is, what shades of blonde are involved, what type of dye, what amount of Vol is in the hair – it can all lead to a big, green-ish, unhealthy mess. Luckily when you’re working with an experienced colourist using good quality products, those disasters can be easily avoided!
Blonde hair mid. Jan 2015
Pink hair Feb 2015


As you can see in the above photos, although my hair looked pretty, the texture was quite dry and damaged near the ends, so it was really important to stop bleaching and colour treating my hair for a little while.


Let me tell you guys, it’s hard to feel attractive when your head is piled up with dye and you’re wearing what is essentially a high quality garbage bag.


Once the dye was washed out, my hair was thinned a tiny bit on the right side of my head (the heavier side of my part), as to the left of my part, my hair is that tiny bit thinner, and so much easier to handle! Having the two evened out has helped A LOT in the last two weeks alone. Then my hair was blow dried, and given a slight wave/curl, and voila! Done!


It’s actually quite a subtle change – I wasn’t greeted with the shocked gasps and screams that came with my first attempt at balyage, nor the squeals of going to back to blonde, but a lot of people do love it (including yours truly) and I couldn’t be happier, honestly. This colour is going to be so much easier to maintain, so much easier to style, and it’s got the right hint of blonde to be going along with. Stepping down to a darker shade for Autumn/Winter is also pretty exciting, and I feel a lot more confident going along with this season’s trends now that I have the hair to pull them off.


Until next time my little birds,

Tweet tweet xx

That's My Face

The face in question


So last night was a big night, my little birds. I'd been invited to not one, not two. but THREE different 21st parties in three different suburbs. Unfortunately I could only make it to two, but still - two twenty-firsts in one night is pretty intensive! That's twice the hugs, kisses, food, drinks, singing and dancing, and twice the amount of meeting a whole bunch of new people and hoping they'll like you and that you look ok and that your dress looks nice and not like you're a Christmas Ham shoved into a sock...

Christmas hams aside, I needed to make sure my face was looking a-ok, because remember - two twenty firsts ALSO means double the photos!

Here's how I achieved the polished look above; I wanted something fairly matte, with a dramatic eye, and a pink, vintage feel to it.


(1) Alll About That Base
I began with my Face of Australia matte eye primer. Whilst 'matte' may sound like it'll dull down shimmer shadows, it doesn't at all! If anything my metallic and glitter shadows pop that bit more with this as the base. I apply it all over the lid, and under the brow bone, with my ring finger. I then smoothed on my Cetaphil daily moisturiser SPF 50+, because it's my must have, daily moisturiser, and I always wear it under my make-up. I then topped it off with my Nude by Nature Airbrush mineral primer


(2) The Eyes
I like to use a neutral, matte shade under any eye look, so I powdered my whole lid, particularly the inner corners, with 'Heaven' from the Too Faced naturals palette (top, pale shade). I then followed using the same blending brush, with Chi Chi's Bases palette, using the peach shade (third colour from left) over the main part of my lid. I then used a light pink, and layered 'Silk Teddy' (pink shade) from the Too Faced palette over this. I switched back to the Chi Chi shadows, using a darker pink from about the middle of my lid to the outer corner. I then went back to the Too Face palette, and used 'Push Up' (beside Silk Teddy) in the outer corners. Then I created a cut crease using the shade 'Chocolate Martini' (bottom left corner), blending with my ringer finger to soften the shadows together.


My finished eye 'look'
(3) Liner & Brows
For a more vintage, lasting look, I took the Maybelline New York Hyper Glossy liquid liner in 'Blackest Black'. I used a different technique last night for my winged liner, using a diagram I'd found on Pinterest instead of my usual swipe out-to-in, then do the wings and hope they match up. I was pretty happy with the results, but I always find new techniques a bit daunting because I am such a creature of habit!

I then used the amazing Max Made's guide from the Sportsgirl Masterclass to perfect my brows and I was so, so happy with them! #datbrowgametho


(4) Conceal Don't Feel
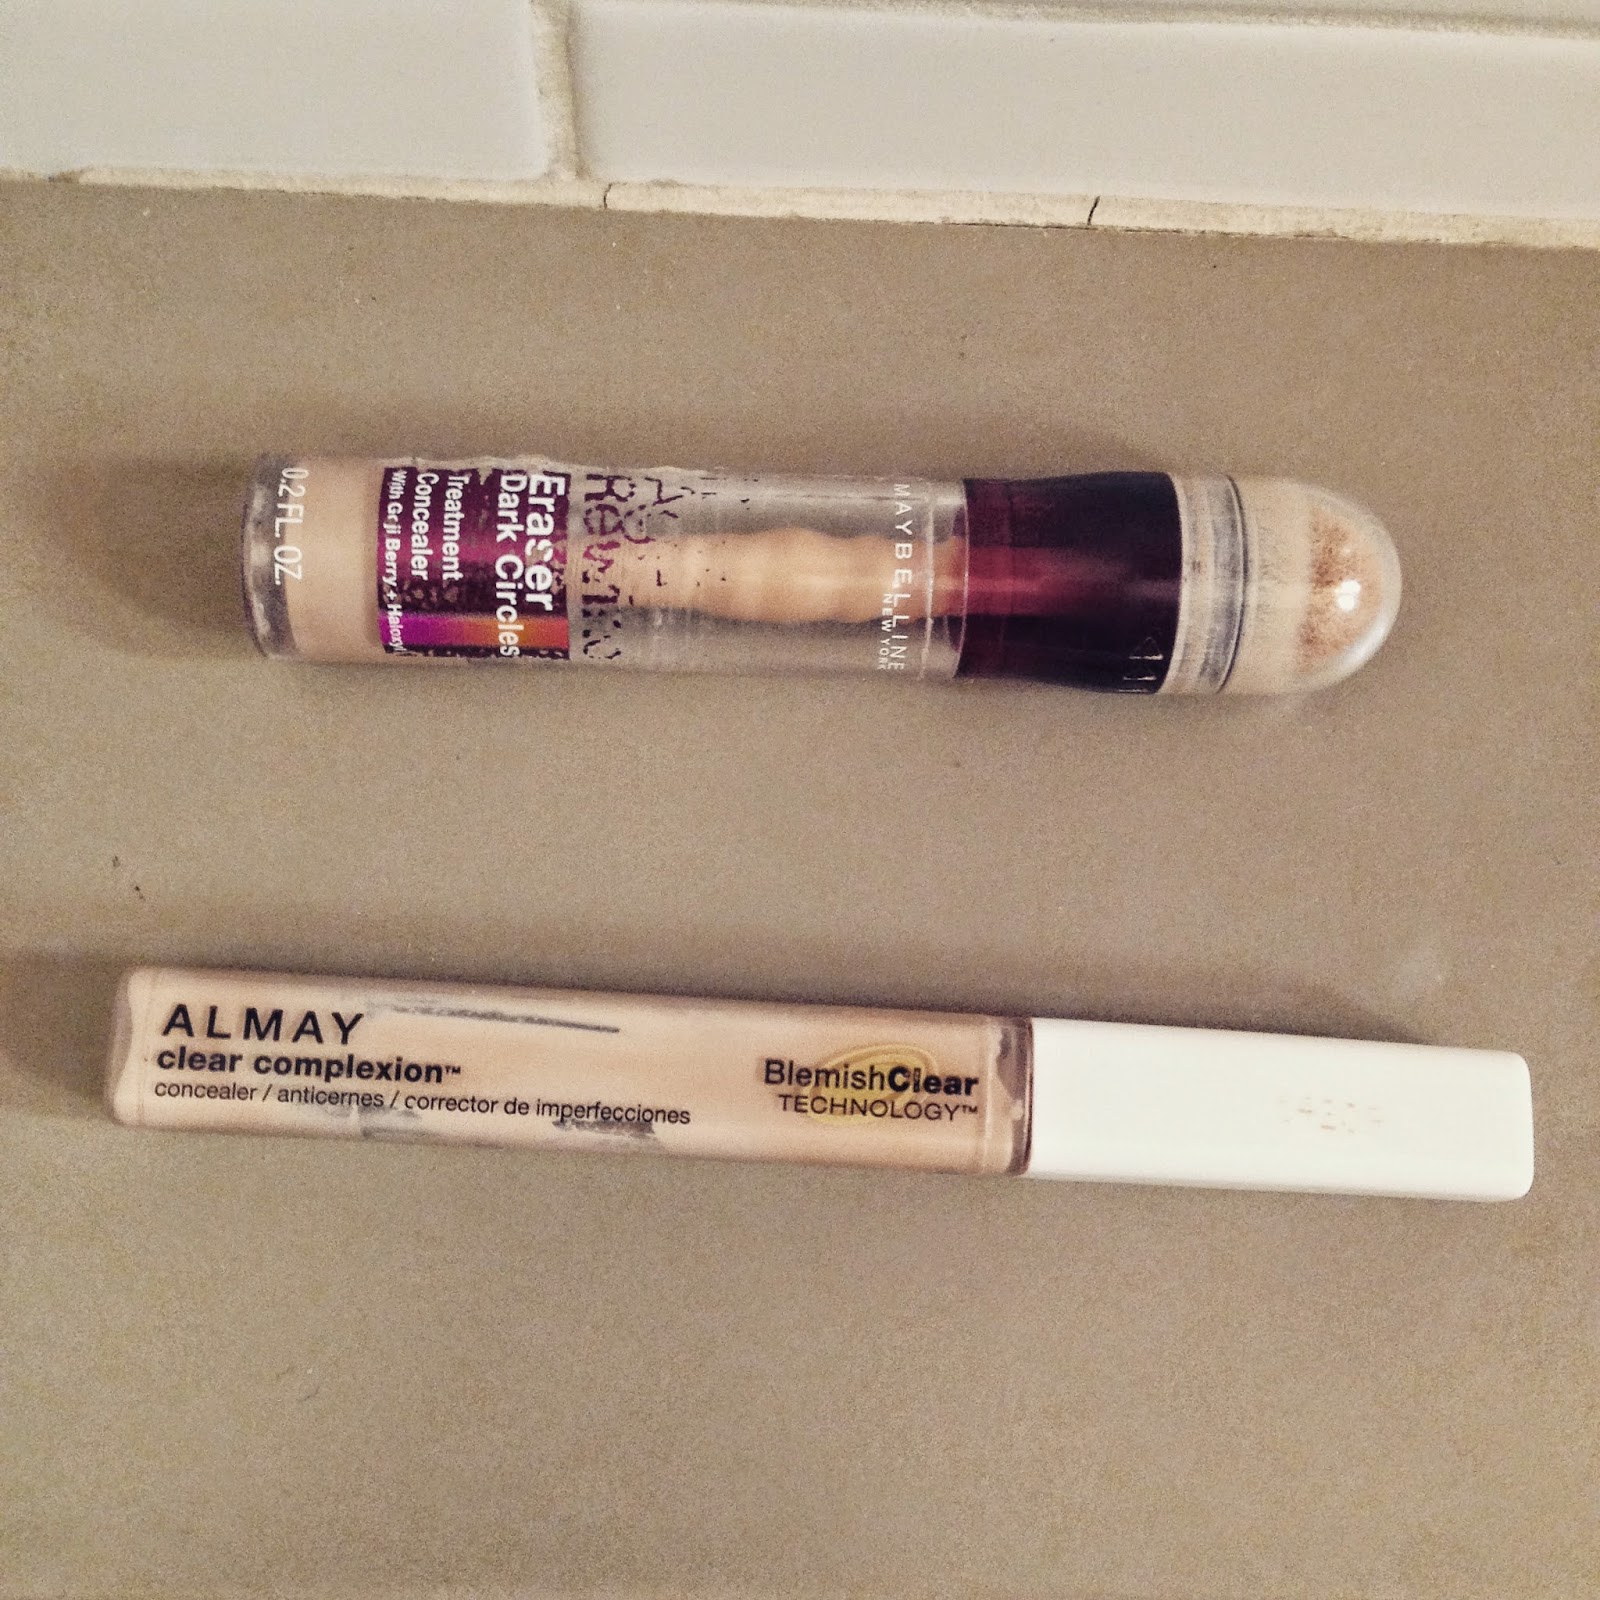
Firstly I used my Maybelline Age Rewind under eye concealer, making two large triangles under my eyes and onto my cheeks with the product. I then followed this with my Almay Blemish Correct concealer in 'Light', a make up bag staple since I was fifteen. At the moment my skin is behaving fairly well, however, I've found quite a bit of redness under the skin. I'm putting this down to possibly having my showers too hot, or stress as it hasn't been an easy few weeks for this little bird!

(5) ***Flawless
Ah, the part I love most! Foundation time! Using my Real Techniques foundation brush, I buffed my Australis Stay Put foundation in Nude all over my face, making sure it blended into my hairline and underneath my jaw as perfectly as possible. I then went over the still visible blemishes with some tiny dots of concealer again.

(6) Trunking... Or 'the thing I really, really, really need to practice a bit more'
Boy howdy. I was so inspired and so, so excited from the Max Made session (seriously I'm probably not going to to shut up about this for like, ever) that I was desperate to try as many of his techniques as I could. I took my Benefit They're Real! mascara and attempted 'trunking' my eyelashes. I ended up with a bit of a clumpy mess in the end and had to blot quite quickly, and quite a lot, to get my lashes looking their usual curly best. I also applied a coat of the Sportsgirl Fibre Lash mascara, just to really thicken up my lashes and make them look as gorgeous as possible.

(6) The Final Countdown
Ah, the bit I love second most! Powdering and contouring! I applied a tiny bit of foundation over the concealer I'd put on before my mascara, and then buffed my face and neck with the Rimmel Stay Matte translucent powder. I LOVE THIS STUFF. SO, SO, SO MUCH.
I then took my bronzing brush (which is quite small and not so fluffy), and my Maybelline Dream Sun bronzer and contoured like a demon; my cheeks, my forehead, my nose, my chin, no where was safe! I then followed with my Chi Chi blush in a medium pink colour along the apples of my cheeks.
I then took my kabuki brush and my Nude by Nature mineral blush/illuminator, and swept it gently across the tops of my cheeks and down my nose.


(7) The Finishing Touch
I spritzed my face with the Australis Finishing Spray, and was ready to leave!

In the car I quickly applied my Nivea lip balm, before carefully, carefully applying my MAC Chatterbox lipstick. Then it was time for a quick selfie before partying the night away! (Chatterbox on the right)


I hope that all made sense my little birds, I'm going to try and do more of these tutorial-style posts in the future

I hope you've all had a beautiful, beautiful weekend,
Until next time.
Tweet tweet xx

Max Made Masterclass (or the time I dorked out like a pro)

Surprise! My last post I mentioned a surprise and here it is -

On Friday night I was lucky enough to attend the Max Made Masterclass at Sportsgirl, Bourke Street!


I arrived good and early, and like the major dork I am, took a seat in the front row. Sportsgirl staff were handing out sparkling water and I was so excited to find a pen and notebook in my bag. I'm a huge nerd so by the end of the masterclass I had about twelve pages of notes and sketches that I'm going to share with you all! 

Waiting for Max to come out and start teaching!

Max came out with his stunning model, and I was so excited to hear we would be learning how to master the Folk Rock look, the gold smoked eye. 
Gift Bag Goodies + the Bold in Gold cheat card 

My first impressions of Max were that he was tall - very tall - and I could immediately pick him as a make-up artist. The on trend ripped denim, shiny black t-shirt, cool loafers and healthy tan, as well as the confidence - this was someone who knew his craft and OWNED it! 

The products used for this look included the Metallic Eyes Bronze edition palette , the Bronze Me jumbo bronzer, the Get Cheeky blush palette in Pyramid Rose, the Blink Big fibre lash mascara (which I've previously blogged/raved about!), the Draw the Line liner, the Pencil it In Brow Pencil (which y'all know I've been loving since 2013) and the Duchess lipstick (which I got in my goodie bag! Yay!).

Max picked three gorgeous girls who also had the look replicated by a team of three make-up artists whilst Max was talking and teaching. I was sitting quite close to them, and I can tell you each girl had a different skin tone and hair colour, and this look was incredible on all three of them!

 
Max the Master at work

One of the most important features of this look were the brows. Max gave some great tips on how to master the bold brow, and if you can follow my little diagram you'll see what I mean:
I tried these tricks last night for my brows and THEY WORKED. Essentially you take your pencil and line it up vertically with your nostril - that's point 1. You then position your pencil diagonally from your nostril, and that's where you make your arch, point 2. Then, you take your pencil to the very, very outside of your nostril, and make point 3, and join the dots - voilà! Perfect brows!


More diagrams of How To...

Max also taught us the technique of trunking, where the mascara wand is used to create "roots" in the lashes before applying your usual two coats. I did try this technique last night but I think I need more practice, as I just ended up with a big clumpy mess that I hurriedly had to fix before leaving. 

Just to give you an idea of how AWESOME this guy is, HE TOOK MY MODEL PHOTO FOR ME! 
(which was lucky because I was actually WAY too short to even get anywhere close to her face for a photo)

Then the class was over! Everyone rushed up for photos, and then rushed out, and I waited patiently with my little notebook and asked Max what his NUMBER ONE, ABSOLUTE tip for beauty would be, and he said.... 

"Contouring. Contouring gives you structure, it's so, so important. And brows, brows give you the bone structure and frame the eyes, they're so important."

After that I walked away practically squeaking in excitement. I called the Little Red Blogger to thank her (she tagged me on Instagram and I was able to get a spot super quickly!), and was nearly walking out of David Jones when I realised I left my goodie bag back at Sportsgirl! Luckily it was still there and all the staff were really lovely about me being my dorky self. 

And to top off what was seriously one of the most exciting Fridays, the MAN HIMSELF liked and commented on my Insta post! 

Don't mind me, just over here freaking out...

OH and that's another thing! Beauty By a Sparrow now has an official Instagram! So for updates, daily thoughts and photos, follow me @beautybyasparrow 

Until next time my little birds,
Tweet tweet xx


P.S. I met a lovely blogger, from Melbourne Fashion Journal at the masterclass, so check them out for their take on the evening! 


Going to the Dark Side

I've fallen in love.

I know, I know. I can already hear what you're all saying. So soon? When? How? Are you already over your last love? 

What can I say? When you know, you know... 


Ash blonde balyage, you will always have a place in my heart, and haunt my dreams, but I can't deal any more. 

I can't deal with the re-growth, the maintenance, the cost, the whole kit and kaboodle. I do love being a blonde and I think it suits me quite well, but a student budget and champagne tastes - and hair! - just doesn't work out. 

So I was trawling through Pinterest (don't we all) and minding my own business, when 
BAM!


Oh. Oh my. 

Luscious, dark, rich, chocolate brown curls. Goodness gracious me. 
I've written before about how ashy blonde-brown my natural hair colour is, and whilst I still believe an ash blonde balyage would have worked with my natural tones, there's something about the richness and depth of this brunette shade that I can't resist. 


Anne Hathaway is bae

Melbourne is quickly moving into more autumnal, wintry weather, and the less sun I see the less I feel summery, bubbly and blonde-like, and the more I'm attracted to auburn, brunette shades. I'm also loving pale skin against rich, mahogany and cocoa palettes, and as we move into winter and fake tanning becomes far less necessary, I think my own pale skin would 'pop' a little more against a brunette shade. 

I'll admit I'm a little scared. Stepping down from gold/blonde to brunette isn't as easy as TV would have you believe. That being said, last February my hairdresser managed to get me down from a brassy-gold to a quite dark, dark almost black-brown without too, too much drama or damage. Even if I have to first go down to a caramel-brown before I can get to the chocolate-auburn shade, I'm more than happy for that to be the process. 


More than anything, I feel I need a change. Going to pink a few weeks ago gave me a taste that I want more of - something different, something new, and something that will hopefully be a little less intensive than maintaining my blonde, currently. I'm overdue for a trim anyhow, so at my next session with my hairdresser I'm going to get her advice and tips for going down to such a dark, warm shade. 
In the meantime LOOK AT IT IT'S SO PRETTY 


I mean come on. And with Easter next week, it's never been a better time to do chocolate! 

I haven't been this obsessed since I found Sportsgirl lipsticks and that's really saying something. Also I'm planning to travel at some point this year, and I know that a darker, brunette shade is going to be so, so much easier to up keep while I'm away than any blonde could ever be. 

"BUT WHAT ABOUT BALYAGE?!" I hear you cry. I know, I know. I do still adore the soft, feminine feel of a well done balyage ombre, but as I said, I need a change, and I know the more that I try to do to my hair at once the more damaged it will be. And just because I'm not doing a balyage immediately, doesn't mean I can't or won't in future. This year's big hair trend is a new technique called baby lights, where, like balyage, whisps of colour are painted, free hand, through the hair, particularly closer to the face, to give them impression of sun kissed, youthful lockes. 

Baby lights with balyage 

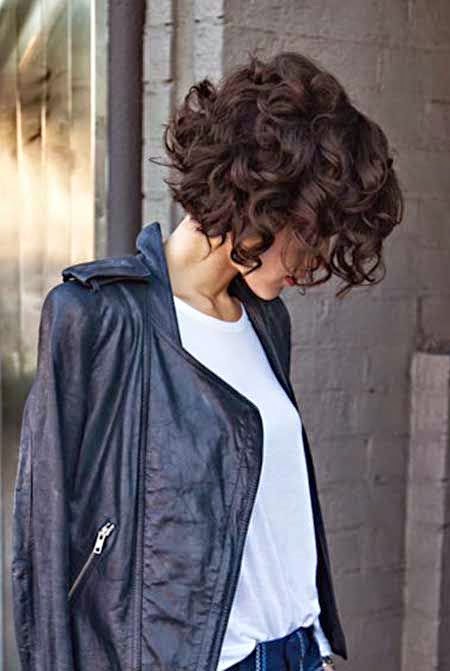
And just to confuse myself that little bit more I found these gorgeous photos on Pinterest that have now got me, once more, considering a BIG CHOP


I MEAN IT'S ALL JUST SO PRETTY

I'll keep you posted my little birds, and whatever I decide to do with this crazy mane of hair, I just want it happy and healthy.

Til next time, 
Tweet tweet xx


Autumn is here! (sort of)

Hello my little birds!

Autumn is here in the city of Melbourne! Well, sort of. In true Melbourne fashion we've had days in the low twenties, high teens, and days almost reaching thirty, followed by thunder storms so vicious trees have been brought down and trains delayed.


At least it's never boring!

In the lead up to autumn and the new A/W season, I've been scouting around and trying to get some inspo for both my wardrobe and beauty looks. Knitwear is BIG this season, and I'm excited for warmer, cosy fabrics. My only criticism is that neutrals, greys and pale, pale pastels seem to be the go this season, and I'd really rather not. Autumn and winter are already such gloomy, dark seasons, I prefer to inject my wardrobe with a hit of colour over a plain basic.

Last year I came across the trick from The Beauty Department last year and I LOVE IT.


Mainly because I hate seeing carefully applied and blended foundation all over the collars of my favourite knits and scarves.
I do have a slight variation, however; at times I'll use a tissue instead of a wash cloth, simply because washing make up out of wash cloths isn't fun either.


I am desperate for some new jeans, and this year a lot of brands are offering not only a great variety, but competitive pricing. the ripped/torn denim look is back in a big way, and whilst I like it on some people I don't know that I'll like it on me - my style is more vintage, retro girly than tough and grunge.

Fashion aside, beauty is looking anything but neutral for the new season.

Once more I need to rave about Sportsgirl beauty. I used some excellent self control and only bought ONE lipstick and ONE nail polish the other week, and I was very impressed haha!
I chose the shade 'Bitten' for the lip, because it's a darker shade than I'd usually go for and it reminds me of red wine, rich stews, and falling leaves.
I cannot for the life of me remember the name of my nail polish, however I've been really into matching my nails and lip shades lately - something about the coordination makes me feel all organised and glamorous!

Here I am wearing both, and I love teaming this rich, plum-wine shade with grey, I feel like it just pops so wonderfully, no matter how dreary it is in the city!


I recently splurged with some generous Myer vouchers from my 21st, and grabbed the Benefit Cosmetics They're Real! gel push-up liner and mascara.

I like the packaging of both the liner and mascara, and they felt very special in my hands. I'd always heard great things about the mascara, and I was lucky enough to see all the "policemen" walking around Myer in the city advertising the liner. Whilst I've loved the mascara and I have found it's plumped up my lashes and made them look very curled and doll-like, the liner I've struggled with.

The tip before use
It should be noted I've never used a gel liner before, so I believe I'm going to need a little more practice before I can really 'get' it. I also found the instructions a little tricky; once you remove the orange stopper the guide said to turn it 'a few times' to get the product up, however I struggled and ended up wasting a tiny bit of product because I turned it that little too much. I've also found one twist per use hasn't worked for me, but maybe that's because I've got such huge googly eyes haha!


This season, aside from sticking to my vintage/retro strengths, I'm going to be experimenting with some different styles and dressing - dare I say it - a bit sexy.
Ripped jeans aside, I can't go past a good skinny jean, especially if it makes the butt look good. I'm also a fan of high waisted jeans - I don't have the figure just yet to pull off tucked-in shirts, but I find the denim and fit of high waisted jeans means they're far, far less lightly to stretch out and slide down.

I've yet to wear this top anywhere but I love it! (Well actually, I DO have somewhere to wear it this Friday, but you'll have to watch this space to find out what that's all about!)
I'm thinking of swapping the black over for the red, but I'm honestly such a fan of the shape that I'd love to have it in every colour of the rainbow!

I've found a pair of boots that I am loving, but saving up for - because Urban Decay launch next week and I think some of my money may coincidentally disappear - that have a LOW heel. Aside from the fact that heels aren't comfortable, I have major calf issues. Yeah, I know. Some people don't like their noses, some don't like their arms, I can't wear heels without my legs cramping up so badly the last time I was 85% I was going to die. Not fun folks, not fun at all.


Autumn/Winter isn't my favourite season, but I'm looking forward to new beauty and fashion trends and adventures, and enjoying everything the beautiful city of Melbourne can offer me this year.

Until next time my little birds,
Tweet tweet xx


My Swisse Prize Pack!


Hello my little birds! In my last post I mentioned some Swisse cleansers and creams, so I thought I should elaborate!
Around August last year I was lucky enough to win a Priceline competition, by Swisse, with  over $150 worth of products. I’ve been slowly working my way through all of them, because I actually got that much it’s been hard to handle!


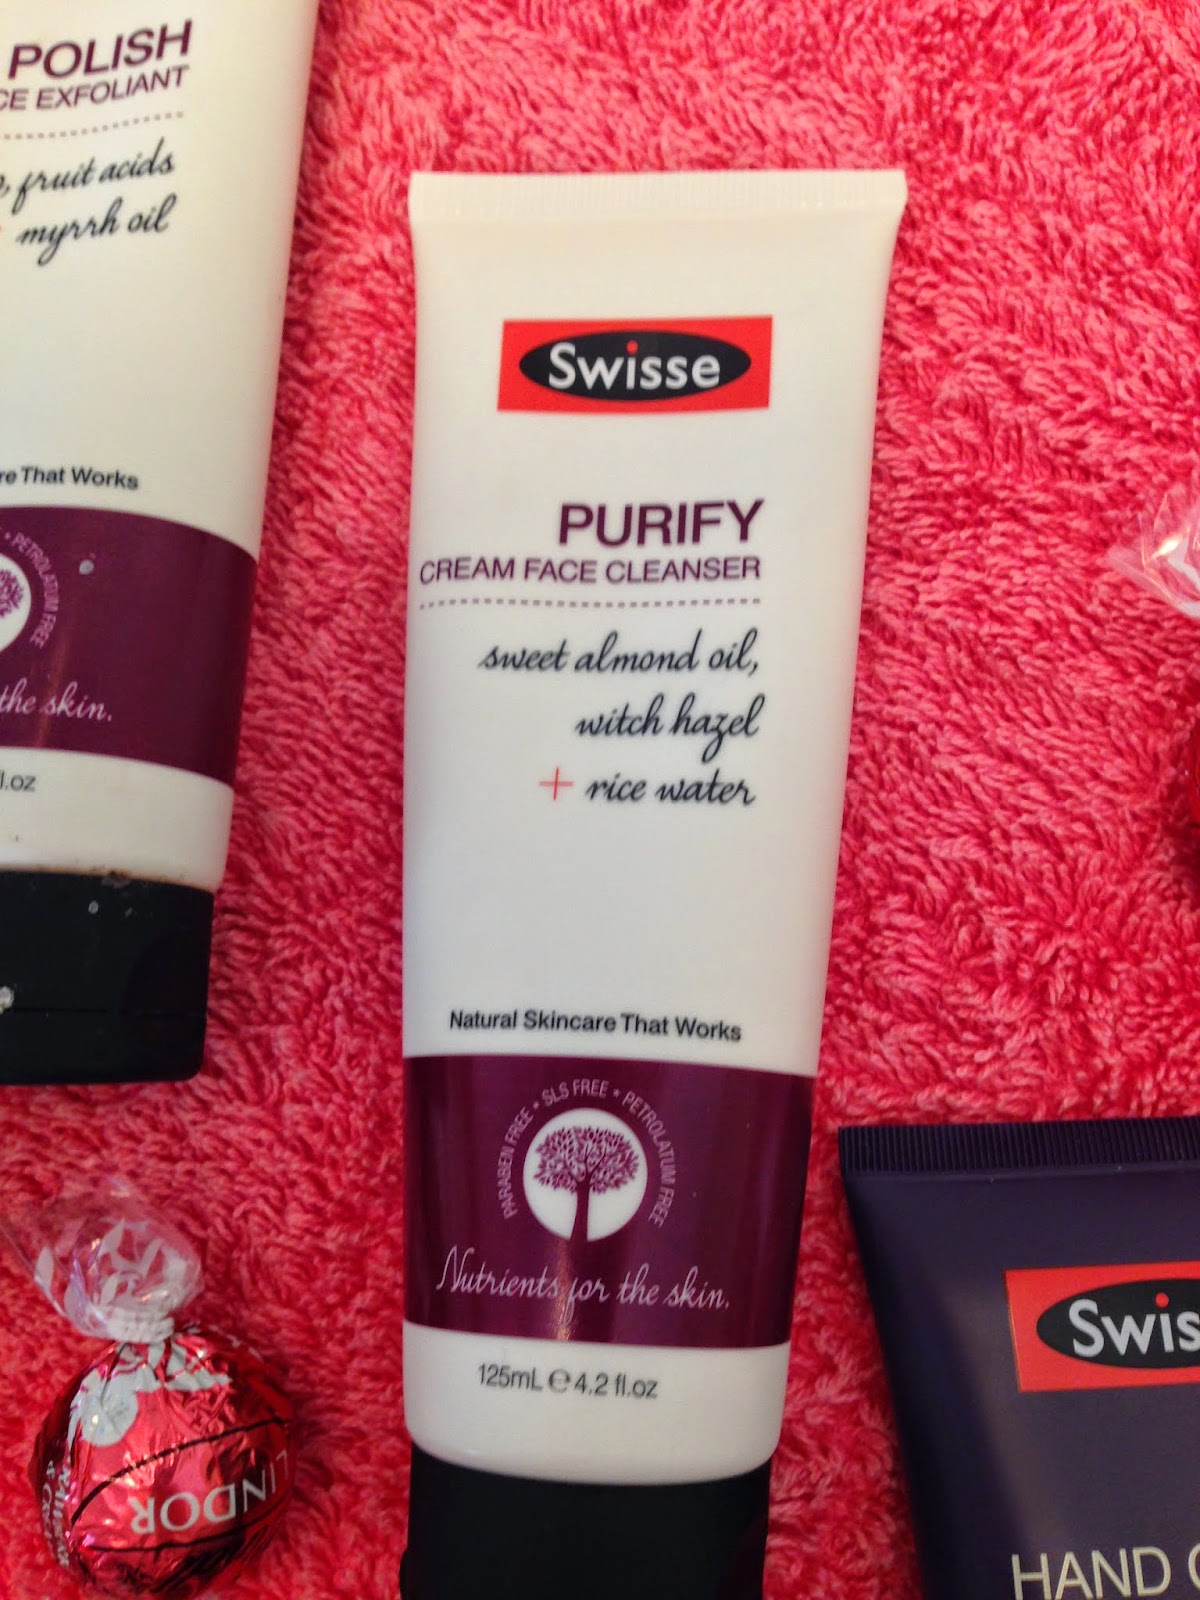
I’ve been using the Swisse Purify Cream Face Cleanser each morning and night, alternating with the Swisse Polish Face Exfoliant. Whilst I’ve enjoyed the Swisse cleanser, I think I much prefer St. Ives’ Apricot scrub as a facial exfoliant. Whilst the Swisse Polish works, and doesn’t upset my skin, I just don’t feel it cleans as thoroughly as the St. Ives’ brand scrubs.


The Swisse Body Scrub arrived just in time, as I’d run out of my Soap & Glory Breakfast Oats scrub. If you can’t tell from the photo, I’ve nearly used the entire tube, and unfortunately that’s not because I love, love, love it. Whilst it’s gentle and doesn’t upset sensitive skin, I found that to get off fake tan, or to really see a difference in the texture of my skin, or to really see a difference, I had to use more of the product than I would of my other scrub. I would probably re-purchase it for use during summer, when my skin can be a little more sensitive due to sun exposure.


The Swisse Recovery Anti-Ageing Night Cream is wonderful, though I do have a slight issue with the scent. Whilst I know there are no fake fragrances or perfumes in Swisse products, the natural scent of hibiscus took quite a while to get used to. In terms of the general feel of the cream, it’s soothing and thick, and my skin feels plumped up and fresher when I wake up.

I haven’t opened the Swisse Hand Cream with Vitamin F and Pomegranate, simply because I’ve still got my Vaseline cream and my Palmers lotion on the go, and opening a third hand cream seems like a bit of overkill. From what I can smell, though, the hand cream isn’t kidding about the pomegranate scent. I’m hoping it’s not a repeat of the hibiscus in the night cream, however, as that took me a good three weeks to get used to, and obviously a product on your hands during the day could be a tad more overpowering than I’d like.


Speaking of products on your hands, I’ve been using the rose hip oil on and off to combat my psoriasis and dry skin during the day, and night. I try to avoid using the oil when I’m working, as the oil could obviously stain fabrics such as silk, but when I’m at home or before I go to sleep, I’ll rub about two drops of the oil on my fingers and rub it into my palms.
I haven’t yet used the Swisse Bioactive Nature Oil, as it claims to do a lot of the things my Palmers Cocoa Butter Firming cream does. When I go through my bottle of that, I may start to use the Bioactive Oil, to compare.


 And that’s it! Thank you again to Priceline and Swisse for my incredible prize, all of the products are of such a high quality and I really do enjoy using all of them each day to feel natural and beautiful.
Until next time my little birds,
Tweet twee xx


P.S. I DID A COLLABORATION! With The Little Red Blogger! Go check out her amazing work and the interview we did together, it was so, so much fun, and her blog is INCREDIBLE!