Showing posts with label #PricelineAustralia. Show all posts

Cult Products: The Good and the Meh

Hello my little birds! 
I’m sorry I’ve been away for so long, work, life and all of that wonderful stuff has been a little intense lately.


So I’m making a comeback with my thoughts on some of the big name products I’ve been trying lately!


First up – NARS Sheer Glow. 
I know, I know, I went on about this baby a few posts ago, but now that I’m almost two months into using it consistently and constantly, I need to say it.

HOLY. GRAIL.


Holy grail foundation. I know, a big claim, but I am still so, so in love with this foundation. I’ve changed my application method from using the Real Techniques buffing brush to smoothing it on with my fingers. I find it gives me a little lighter coverage, that’s more buildable, and feels nicer first thing in the morning.
Worth the hype? Absolutely.
10/10


Last month I treated myself to the original Naked palette by Urban Decay. 
I actually can’t describe how excited I was to open up my post package and carefully take it out of its box. The packaging is gorgeous, chocolate brown velour with a magnet closure, and a lovely big mirror to go with the shadows. 


The brush that comes with the palette is incredible too!
In terms of the shadows, I quite like the shimmer shades, especially Virgin and Half Baked. They’re quite pigmented and give enough shine without large glittery fragments. The matte shadows are nice enough, but I prefer my Too Faced Naturals palette. I haven’t tried the darker shadows, simply because I haven’t had an excuse or reason to whip out a smoky eye lately. But it is pretty to look at, and hold… and there is a great variety of colours in the palette, some of which I haven’t swatched or used just yet.
Worth the hype? Eh, kinda.
7/10

I’m a dirty blogger. 


Last month I ordered my first, of what will be many, Frank Body coffee scrubs and OH MY GOSH. My skin feels amazing, soft and nourished, my shower is a coffee bean infested mess, but it’s so worth it. If I had one minor complaint (and I do), I hate that you need to leave the scrub on for five minutes before rinsing. Not because I don’t like waiting (I can be patient when I try), but because it’s FREEZING. Freezing, freezing cold; the pack recommends five minutes but it’s a struggle, folks, standing in the shower DESPERATE to jump back under the hot water.
Worth the hype? YES.
9.5/10 (because waiting and being cold sucks)


In terms of beauty inspo Zoe (Zoella) is kinda up there, so when she started raving about Maybelline Lash Sensation Mascara I thought I’d give it a go. 
Coles had it on special so I figured, why not? AND OH MY GOD AM I GLAD I DID. THIS STUFF IS AMAZING. It looks like I’m legitimately wearing false lashes, more so Maybelline Falsies, or Benefit They’re Real! 


This photo was taken about four hours after application and they still look phenomenal, and since the formula is waterproof there’s no risk of smudging or shadow during the day’s wear.
Worth the hype? HECK YEAH
10/10

It's spring! (WHEN DID THAT HAPPEN SERIOUSLY HOW ARE WE IN SEPTEMBER ALREADY??)
Aside from my shock and concern over the fact that we're already in September, spring time means that summer isn't far away, which means, you guessed it, this pasty little beauty blogger is going to start seriously tanning again soon. Whilst I'm in love with the St. Tropez mousse in Light/Medium, I don't have the time currently to be applying and waiting for it to dry, etc., so I wanted to use a gradual tanner for now. I've used the Dove Body Glow, Le Tan Gradual Tan, and Palmers' Cocoa Butter Gradual Tanner in the past. This time around I decided to opt for the Bondi Sands Everyday Tan, after reading some very positive reviews online. Before I found St. Tropez on sale (Oh, HAPPY DAY!), Bondi Sands was my go-to tanning mousse, so I figured the gradual tanner would be the same quality. 

And so far, so good! What I love about Bondi Sands is their tan is red based, rather than brown or orange. This means, for me, having a pinker skin tone, the tan looks that touch more natural. Unlike the Palmers' Cocoa Butter Gradual Tanner, which starts depositing colour almost immediately, the Bondi Sands takes 1-2 days to start clearly showing up. That being said, it's a really nice, warm, natural looking tan, however I've found the Palmers' tanner to be more moisturising. What I've been doing is alternating each day, one with Bondi Sands, the other with Palmers' Cocoa Butter, just to keep my skin nice and moisturised.
Worth the hype? I'd say so!
8/10


Now I’d like to quickly re-visit a product I reviewed a little while ago, because it’s a cult classic, and also… Well, I’ve had a slight change of heart.
When I first tried the AContour palette, I struggled. The powders were highly pigmented and good quality, but not quite right for me. I pushed them to the bottom of my make-up bag, thinking, if anything, I’d try it out again this summer when I’m tanned (by the bottle) and going out, etc.
Well HOLD YOUR HORSES, FOLKS, BECAUSE I ACTUALLY WENT OUT. SERIOUSLY. I WENT AND DID 21-YEAR-OLD-THINGS. And that involved being tanned, and a lower cut top, and I tried something I’ve never done before.
I contoured my boobs.
Yep.
That happened.
And it went… well? Really well, actually, it looked quite natural, and I have the AContour palette to thank for that! So… thank you, Australis!
Worth the hype? Actually, yeah!
8/10


Also I FINALLY HAVE A GLASSHOUSE TAHAA CANDLE MY LIFE IS COMPLETE I AM SO SO SO HAPPY AND THE VANILLA SCENT IS ACTUALLY AMAZING
Worth the hype? YES.
11/10, 12/10, ALL THE NUMBERS/10


So there we have it, a few cult classics, a few new favourites, and a couple of misses, and a whole lotta reading for those of you who've missed this bird!

Until next time my loves,
Tweet tweet xx


July Buys


WINTER IS HERE LITTLE BIRDS
AND 
IT
IS
FREEZING

Melbourne has been outdoing herself lately, bringing in sleeting rain, cutting winds and mornings so cold that breath comes in cloud puff or smog options. Frost, ice, and even snow in some of the outer suburbs. So, naturally, I've found myself drawn to warmer options beauty-wise and wardrobe-wise too.


Today I had a mini-spree at Priceline and Chemist Warehouse, and honestly, I shouldn't be allowed in their beauty aisles unsupervised. 
Pictured above are my favourite buys, and newer picks, from July so far. Ripped denim is an easy way to look casual and fresh, without compromising on warmth or style. Ribbed knitwear has been a key trend this Autumn/Winter, and I love the creamy colour of this piece from Cotton On. It works with both blue and black denim, and I love it with tan ankle boots. My navy Converse chucks are an awesome wardrobe staple - so, so comfy, and they're perfect for pairing back dark denim, and they'll work beautifully with summer dresses and skirts. Rose gold is my favourite metal, and this watch from Forever New adds a hint of glam to even the most casual of outfits, and I'm in love with my Samantha Wills Bardot Bohemian Ring!

Before bed, when I want to unwind from a busy day at work, I've been burning my Glasshouse Esperance triple scented candle. It's amazing, it smells of apples and mimosas, and it's just the most relaxing scent. 

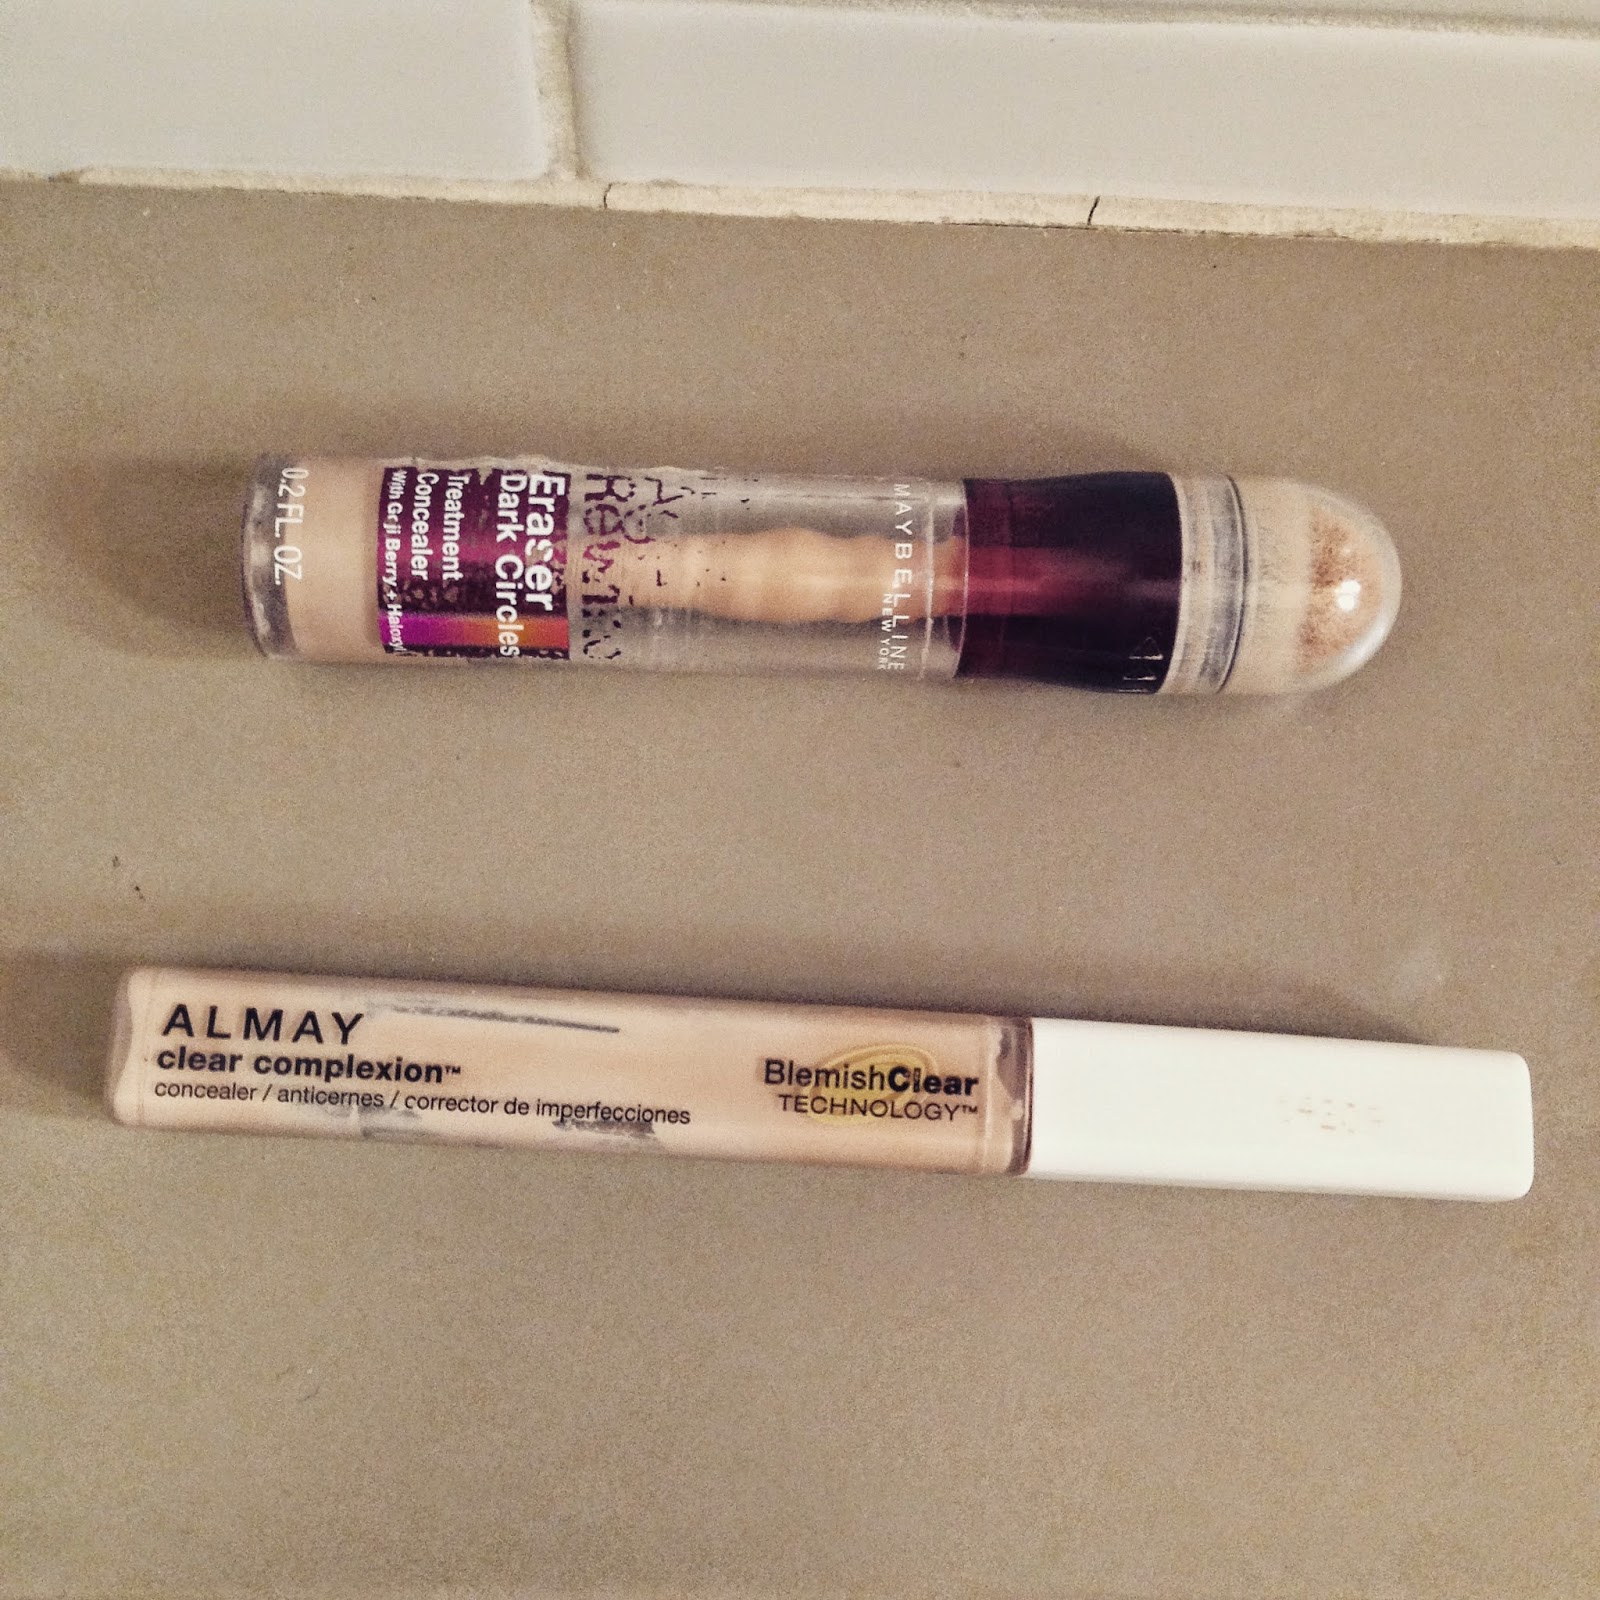
Finally today I managed to re-purchase the Maybelline New York Age Rewind concealer. This stuff is amazing, and I can't wait to start using it again. I've had to grab the medium-dark shade this time around, but the Goji berry extract won't be any less effective on these big black circles! Another very necessary repurchase was my Face of Australia matte eye primer. Don't let the 'matte' fool you, shimmer shadows and whites look phenomenal over this cream. 

Another very necessary repurchase earlier this week, was the Sportsgirl lipstick in Bombshell. I've worn this shade of red for the last five years and each time I whip her out, I get compliments left, right and centre. 


I LOVE this lipstick. Like the Sportsgirl brow pencil, I'm considering buying about, like, maybe fifty of them, just so I never ever run out of my perfect red lipstick. I'll actually die on the inside if this red ever goes out of production!
The perfect red lipstick means nothing if it isn't perfected on the face, so I took advantage of the Priceline 3 for 2 on Australis eyes and lips, and bought myself a lip liner in 'Lady in Red'. 

Australis claim their lipliners are a 'Emollient and vitamin rich formula that won't dry lips out' - I'll report back if that's true!

Making the most of the 3 for 2 promotion, I grabbed another of their Velour Lips Matte Creams. I adore the shade N-Y-Cee, and I've seen a lot of gorgeous blogger selfies with the 'Hono-Loo-Loo' tone. I was a little nervous, simply because nude-based shades don't always work that well against my pale skin, but I was pleasantly surprised!
I felt like Lana Del Ray with this on


I honestly respect Australis so much as a brand and company. Their products are such a high quality, and I'm so glad to know they're completely cruelty free and still at such a decent price. Even without the 3 for 2, $9.95 is an amazing price for lipstick. 

And the last little Australis goodie I picked up is another that I've been seeing splashed all over Instagram. Last month Australis launched their Metalix eye shadow collection. I was a little unsure, simply because they seemed to be very highly pigmented and better suited to going out/event make-up, something I hardly get to do anymore (social life? Oh social life, where are you?!). I popped a little of the tester on my hand of the shade 'Pearl Jammin' and my rose gold obsession struck. The ROSE GOLD MAN. IT WON'T LEAVE ME BE!

In all seriousness, the shimmer and pigment caught my eye, and I figured, for $8.95, could I really go wrong? 


Look at that shimmer! 


I reaaaalllly want to try this shadow with a bold eyeliner and big, false lashes. I feel like this colour will make my blue eyes pop that little bit more, and I can't wait to have a little more fun experimenting. Believe it or not, I've never used a cream eye shadow before, so this will give me a chance to use new techniques and tools. 

And finally, I bought myself my own little jar of Coconut Oil. I've been borrowing from Mumma Sparrow's cooking cupboard lately and I figured it was time I got my own. Aside from its dandruff fighting properties, and its incredible smell, you can use coconut oil to make exfoliants, face masks, hair masks, and hand moisturiser.


And that's it!

I promise my next post isn't too far away little birds!
Until next time,
Tweet tweet xx


Cleaning My Make-Up Brushes: Lilo and Stitch

Tonight I cleaned my make-up brushes and I feel like the only way I can express this to all you little birds is through GIFs of Lilo and Stitch.


STARTING OFF
heck yeah! Cleaning my brushes!


FIRST BRUSH IN
washing out AAAAAALLLL of the make-up and seeing how much there is... ew


SECOND BRUSH IN
Aaaaand that's my lower back that's hurting 

ya' know, from bending over the sink and squeezing all the soap and goop from the bristles


HALF WAY!
Why did I start this? Why why why?

Internet/Fellow Beauty Bloggers/Experts/By the Book People:
"Because your dirty brushes gather bacteria and it's important you clean them!"
Me:


Parents walk past bathroom twenty minutes in and ask what you're doing... And you tell them... And they respond accordingly


When you're finally up to cleaning your shadow brushes and realise it's nearly finished

Finally being finished! And they're all clean and drying and done!


..... but you realise you have to do it all over again in 1-2 weeks' time...


And that's how I wash my make-up brushes!

Tweet tweet xx


Finding a Foundation: Bare Minerals

Hello my little birds!

I have been FLAT OUT these last two weeks, barely had enough time to ruffle my feathers back into shape!

This week I decided I would FINALLY get around to trying a few foundation samples I've accumulated this year. Aside from the fact I've still yet to get to Inglot to grab my YSM (CAN'T WAIT SO EXCITED AHHH), my Bobbi Brown is (finally! Wow!) running out and I really need a new foundation that will last for work, play and even the little rests I get in between


L-R: Clinique Anti-Blemish Solution, bareMinerals BARESKIN, L'Oreal Tru Match, Revlon Colour Stay

Right off the bat, none of these foundations are the right colour for me. I'm painfully aware of how freakin' pale I am (which will become that touch more obvious over the next few paragraphs), however most foundation samples you receive come in the warm neutral/beige variety, so there's no room for being fussy. So whilst colour is irrelevant, the main thing I'm looking at in these samples are three factors 

FORMULA 
Is the liquid sticky? Creamy? Bubbly? Watery? Weird?
FEEL
How does it go on? Smooth, easy like paint? Sticky and claggy like glue? Patchy? Greasy? Dry?
FINISH
Once it's all on, buffed, smoothed, set, how does it actually look on? Colour aside, of course haha!

First up was bareMinerals Bareskin foundation, a sample from the wonderful Mecca Maxima.
The description reads
"bareSkin liquid mineral foundation has a built in brightening serum packed with Vitamin C so that skin looks luminous at all times. This foundation creates a seamless natural effect with adjustable coverage, so that the perfect amount can be applied. Lightweight in texture, this hypoallergenic foundation it formulated without oil, silicone, parabens or fragrance so it is suited to all skin types. Beautiful bright natural foundation is only one step away."

I opened the packet and immediately realised how off the colour was, for me. 

There appeared to be enough in the sample for one full face of make-up. I used my Real Techniques Expert Face Brush , however BareMinerals released a patented brush specifically for this formula which you can see here. Now whether using their brush would have had a different effect, I'm not entirely sure, but from my experience I found one or two big issues. 

FORMULA
The foundation was bubbly and seemed a tad watery; I was worried it'd dribble off the foil and onto my lap. The idea of the brush is that you directly pour the liquid foundation into the bowl-part of the brush, so that would explain its consistency. 
FEEL
Ooh. Ooh that was nice. Like brushing silk all over your face! So, so soft, so smooth, gorgeous texture, lovely to buff on. 
FINISH
DEWY. SO, SO DEWY. 

You can see how shiny this foundation is on my nose and chin alone. Look at that sheen! I'm not entirely sure why youthful make-up is associated with dewy, wet finishes. In my experience, if young skin is dewy or shiny, it's about to break out HARD. I figured that using a powder (my Rimmel of course) would counter-act the dewy-ness, but I was wrong. 

You can see above that the sheen has died down a little, but it's still quite shiny around the mouth and chin, and along my cheekbones. I couldn't quite believe how bad the colour match was - sometimes neutral/beige colours can be negotiated with to suit my face, however, this shade was all kinds of wrong. The foundation also felt weighty on my face - no where near as heavy as my longwear foundations, but I COULD feel it, and that says enough in itself. I quickly took this foundation off immediately after application, and beneath I could see my skin beginning to grow red. I didn't pay that much attention, simply because my skin is sensitive and reacts to new products the same way some two year olds react to green vegetables. 

Overall, whilst the foundation felt nice going on, it didn't look nice overall, and I already know how my skin reacts to dewy formulations - pimples, pimples, pimples. Oh, and pimples. 

A solid 6/10, but alas, no winner here!

I'll keep you all posted as I go through my other samples these next few weeks 

Until next time,
Tweet tweet x
P. S. I'm now taking requests! Fed up with foundation? Sick of skin care? Had enough of hair? Comment and let me know what you'd like me to look at, try, review and share on the blog! xx


That's My Face

The face in question


So last night was a big night, my little birds. I'd been invited to not one, not two. but THREE different 21st parties in three different suburbs. Unfortunately I could only make it to two, but still - two twenty-firsts in one night is pretty intensive! That's twice the hugs, kisses, food, drinks, singing and dancing, and twice the amount of meeting a whole bunch of new people and hoping they'll like you and that you look ok and that your dress looks nice and not like you're a Christmas Ham shoved into a sock...

Christmas hams aside, I needed to make sure my face was looking a-ok, because remember - two twenty firsts ALSO means double the photos!

Here's how I achieved the polished look above; I wanted something fairly matte, with a dramatic eye, and a pink, vintage feel to it.


(1) Alll About That Base
I began with my Face of Australia matte eye primer. Whilst 'matte' may sound like it'll dull down shimmer shadows, it doesn't at all! If anything my metallic and glitter shadows pop that bit more with this as the base. I apply it all over the lid, and under the brow bone, with my ring finger. I then smoothed on my Cetaphil daily moisturiser SPF 50+, because it's my must have, daily moisturiser, and I always wear it under my make-up. I then topped it off with my Nude by Nature Airbrush mineral primer


(2) The Eyes
I like to use a neutral, matte shade under any eye look, so I powdered my whole lid, particularly the inner corners, with 'Heaven' from the Too Faced naturals palette (top, pale shade). I then followed using the same blending brush, with Chi Chi's Bases palette, using the peach shade (third colour from left) over the main part of my lid. I then used a light pink, and layered 'Silk Teddy' (pink shade) from the Too Faced palette over this. I switched back to the Chi Chi shadows, using a darker pink from about the middle of my lid to the outer corner. I then went back to the Too Face palette, and used 'Push Up' (beside Silk Teddy) in the outer corners. Then I created a cut crease using the shade 'Chocolate Martini' (bottom left corner), blending with my ringer finger to soften the shadows together.


My finished eye 'look'
(3) Liner & Brows
For a more vintage, lasting look, I took the Maybelline New York Hyper Glossy liquid liner in 'Blackest Black'. I used a different technique last night for my winged liner, using a diagram I'd found on Pinterest instead of my usual swipe out-to-in, then do the wings and hope they match up. I was pretty happy with the results, but I always find new techniques a bit daunting because I am such a creature of habit!

I then used the amazing Max Made's guide from the Sportsgirl Masterclass to perfect my brows and I was so, so happy with them! #datbrowgametho


(4) Conceal Don't Feel
Firstly I used my Maybelline Age Rewind under eye concealer, making two large triangles under my eyes and onto my cheeks with the product. I then followed this with my Almay Blemish Correct concealer in 'Light', a make up bag staple since I was fifteen. At the moment my skin is behaving fairly well, however, I've found quite a bit of redness under the skin. I'm putting this down to possibly having my showers too hot, or stress as it hasn't been an easy few weeks for this little bird!

(5) ***Flawless
Ah, the part I love most! Foundation time! Using my Real Techniques foundation brush, I buffed my Australis Stay Put foundation in Nude all over my face, making sure it blended into my hairline and underneath my jaw as perfectly as possible. I then went over the still visible blemishes with some tiny dots of concealer again.

(6) Trunking... Or 'the thing I really, really, really need to practice a bit more'
Boy howdy. I was so inspired and so, so excited from the Max Made session (seriously I'm probably not going to to shut up about this for like, ever) that I was desperate to try as many of his techniques as I could. I took my Benefit They're Real! mascara and attempted 'trunking' my eyelashes. I ended up with a bit of a clumpy mess in the end and had to blot quite quickly, and quite a lot, to get my lashes looking their usual curly best. I also applied a coat of the Sportsgirl Fibre Lash mascara, just to really thicken up my lashes and make them look as gorgeous as possible.

(6) The Final Countdown
Ah, the bit I love second most! Powdering and contouring! I applied a tiny bit of foundation over the concealer I'd put on before my mascara, and then buffed my face and neck with the Rimmel Stay Matte translucent powder. I LOVE THIS STUFF. SO, SO, SO MUCH.
I then took my bronzing brush (which is quite small and not so fluffy), and my Maybelline Dream Sun bronzer and contoured like a demon; my cheeks, my forehead, my nose, my chin, no where was safe! I then followed with my Chi Chi blush in a medium pink colour along the apples of my cheeks.
I then took my kabuki brush and my Nude by Nature mineral blush/illuminator, and swept it gently across the tops of my cheeks and down my nose.


(7) The Finishing Touch
I spritzed my face with the Australis Finishing Spray, and was ready to leave!

In the car I quickly applied my Nivea lip balm, before carefully, carefully applying my MAC Chatterbox lipstick. Then it was time for a quick selfie before partying the night away! (Chatterbox on the right)


I hope that all made sense my little birds, I'm going to try and do more of these tutorial-style posts in the future

I hope you've all had a beautiful, beautiful weekend,
Until next time.
Tweet tweet xx