Showing posts with label #beauty. Show all posts

AUGUST

Do you guys remember when I was all about mattes? Matte shadows, matte contour, matte base, matte lip (still loving those though) and matte everything, essentially?

Let’s all laugh together, shall we?

This year was the year I not only learnt how to strobe, but how to do it properly, and all the joys that come from having THE LIGHT OF APOLLO ON YO FACE.

Highlighters. All the highlighters. ALL OF THEM.

Liquid. Cream. Powder. Eyeshadow (hear me out) – you name it, if it gives the skin a glow, I’ve used it on my face. August saw me swapping my beloved Sheer Glow for the Nars Velvet Tint; a satin finish, medium-full coverage skin tint that made for the perfect base for all kinds of highlighting and glow. And it wasn’t something I restricted to a full-face kinda day – even study days saw me whipping out the Josie Maran Argan Oil Illuminiser, as the Argan oil base gave that bit more hydration and protection to my skin on long library days.

So here are my top fave highlighter/illuminators – for the time being, of course!

Josie Maran Enlightment Illunimiser – liquid crème with a rosy gold

NARS Illuminator in Copacobana, and Super Orgasm

NARS Dual Intensity Blush in Frenzy – used with a wet brush for a POP like you wouldn’t believe!

Hourglass Ambient Strobe Lighting Powder in Incandescent Strobe light – silvery pink that sits beautifully with a blush, and best used with a sponge

Too Faced Candlelight Glow – Rosy Glow

Stila Kitten Eye shadow Single – when used with an extremely light hand, this is the ULTIMATE glow-getter. I’m obsessed. And a multipurpose product that’s so so easy to travel with? SOLD!

Stay tuned to @beautybyasparrow on Instagram for swatches and daily looks with these bad, bedazzling boys!

Tweet tweet xx

JUNE

Ok so you know how sometimes it takes you a while to get on board with something? Whether that be smashed avocado, matcha green lattes (still not quite there guys, give me time), Game of Thrones/Stranger Things/Black Mirror/- insert latest Netflix obsessive show here – or exfoliating with chemicals (still embarrassed about that one), sometimes it takes time to come around to something new.

That’s kind of what happened with La Mer and I. Not that I disliked the brand or anything – don’t get me wrong, I’m all for a luxe brand featuring a fish tank in David Jones – but not unlike, say, myself and a model working Melbourne Spring Fashion Week, we just never crossed paths. I might’ve passed on my way to Priceline and taken a glance, but never had a chance/opportunity/means of going to a La Mer counter, or visiting the shelves at Mecca in Myer.


Enter; The Mother of All Reactions. Ooh boy.
I’m not entirely sure why or how my skin felt the need to freak itself out over a light Argan oil blend, but BOY HOWDY did I hear that freak out loud and clear.


My skin felt like it was cracking. So dry that no amount of my normal serum or moisturiser could help. Make-up? Not an option. My face just hurt. I can’t even really describe it; I just know that at one point I cried to Mumma Sparrow about how bad it all felt.
I knew I had a little sample of Crème de La Mer that I’d been holding onto for Mumma Sparrow, having read and heard all about its regenerative, healing properties. After consulting with Centaine (glossco.com.au) and sussing out whether the La Mer would worsen the situation (she assured me it wouldn’t) I decided to give it a crack.

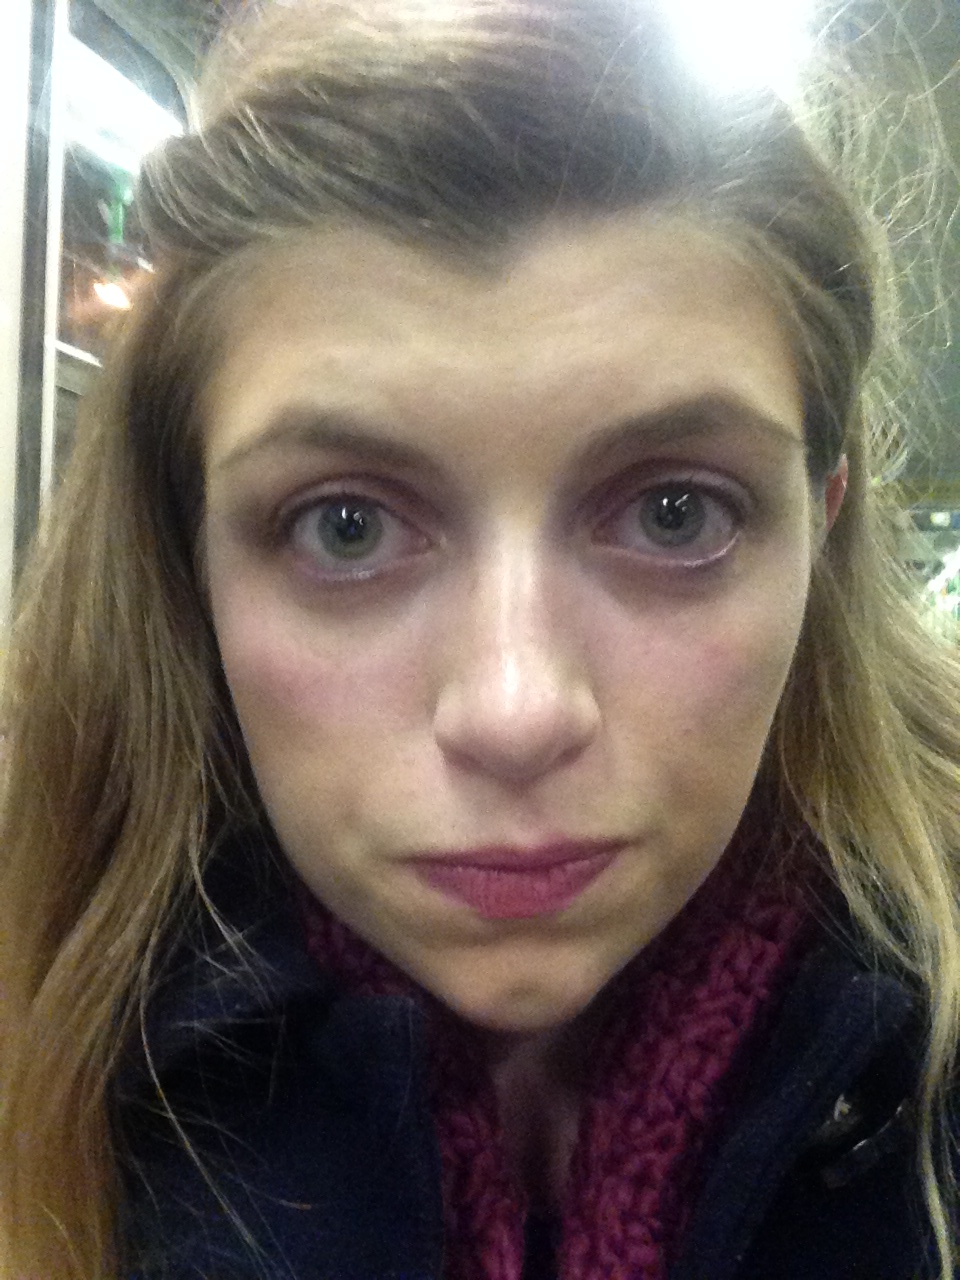
The photo speaks for itself really. 


A week after using the original cream my skin was unrecognisable. I couldn’t believe it. Gone were the dry patches, and the redness, the uneven texture, and my face didn’t hurt anymore. Break outs… eh not much can be done about them when I’m unable to use AHA’s or any kind of spot treatment (skin dealing with a reaction shouldn’t use anything too active because the last thing it needs is something full-on to contend with) but the inflammation brought on by a break out most definitely died down.
As winter wound its way through Melbourne I came back to La Mer again and again, eventually getting onto the Renewal Oil and I think it’s the main reason my skin didn’t totally collapse on itself during a harsh, cold season. La Mer is a brand I now trust absolutely and completely for my skin, and will probably have an everlasting love with til the day I forget what skincare is.


Tweet tweet xx

APRIL

So Dr Dennis Gross MD is a pretty rad guy. Dermatologist in the Big Apple, the best of the best for radiance, clarity, and just plain good skin.


He developed his Alpha Beta Peel Pads for his clients, as a way of maintaining their skin in between clinic visits. I could get super science-y here, talk about AHA’s and BHA’s, acids and neutralizers, but let’s keep it basic (like my blonde in January, HA!)


Ultra Gentle Peel Pads – 3 types of acids to exfoliate + coconut oil. Easy peasy.
Original Alpha Beta Peel Pads – 5 acids to exfoliate
Extra Strength Peel Pads – 7 acids
Medi-Spa Peel – 12 acids. Twelve! OH MAMA.

For the record, I use the Ultra Gentle range because I’m really sensitive, and if there’s even a chance my skin could freak out, it’ll do it ANYWAY because it’s thoughtful like that.

The pads are pre-packaged in sachets; you tear one, use it all over until it’s dry, wait two minutes (and scroll through Insta @beautybyasparrow) and then use the second pad to neutralise the acids eating all your manky dead skin. Follow with your normal serum and moisturiser, and boom! You’re done! Yay!

In case it wasn’t clear, these peels chemically exfoliate the skin. The acids dissolve all of the dead skin cells and are able to get deeper into the pore to exfoliate. Some skins can handle daily exfoliation. Mine cannot. Believe me, I tried. (It was not pretty.)

When using peel pads, I go 3-4 days a week. So Monday, Wednesday and maybe Friday or Sunday. They tend to send me quite red, but it calms down by morning. If you hate scrubs (put DOWN the St. Ive’s!) or struggle with break outs and pimples (YO) then these are an amazing option for you.

I love them to pieces, they’ve changed my skin for the better!

Tweet tweet xx

JANUARY

Forgive me Father, for I have sinned.

Desperately, the week of my twenty-second birthday, I attempted to re-dye my blonde roots by myself. Me, with no hair experience – me, who is not a hair dresser, and does not have any kind of colour or toning skills, me who is impatient as all heck…. You can imagine what happened.

 things could be better


So I literally rang in 2016 at my hairdressers on New Year’s Eve getting my blonde fixed, and New Year’s Day showing everyone a ‘new me’. So cliché, I know, but hey, gal’s gotta do what a gal’s gotta do when HER HAIR IS PURPLE.

I don’t know entirely how I managed to dye my hair orange and purple, but there we go. See the pictographic evidence below and feel my pain friends, feel, my, pain.


My lovely colourist ran a toner through my hair, and essentially colour corrected the orange and purple. Little bit of a trim because I managed to fry my ends. (See when I say disaster it ain't hyperbole.)


The New Year inspires people to do a lot of stupid, stupid things – from drinking too much champagne, to making resolutions we all know we won’t keep, to drastic changes as a means of coping with life changing. Again, very cliché, but the lesson I learnt the hard way was that you don’t get to skip change or recovery and get right to the shiny brand new you after a tough break. You need to give it time, and space, and if all else fails, a colourist who really knows her stuff.


Tweet tweet x

THE 12 DAYS OF BLOGMAS

Hello little birds!

A thousand, million, repeated, gross-sobbing, sincere apologies for being MIA this year. Turns out when you start a new job, and start writing a 15,000 word thesis, it gets a little impossible to do aallll the things you want to do. 

So to make up for my shocking absence I've organised THE 12 DAYS OF BLOGMAS!


A blog a day, per month of 2016, with the best tips, things, lessons, fun facts and just cool beautyful things I've learnt this year, from January-December. Like a Calendar Girl! 

Stay tuned for a-blog-a-day, and a Insta-post-a-day too, leading up to December 24. 

FOR NOW, however, here's a few quick little updates;

I'm now a full-on, unapologetic chocolate headed brunette, and if you've been here for a while you'll know that's a MASSIVE change after being a bubbly blonde for four-five years. Blonde was fun, but as we'll see tomorrow it comes with its own challenges and quirks. Being a brunette has been kinder to my hair, cheaper, and honestly just feels so much truer to my personality. 

I work in beauty, specialising in skincare, and I am LOVING IT. Each day I work is literally living the dream. I've learnt so, so much this last year that I can't wait to share, and, bonus, I've made amazing amazing friends in the industry (like Natasha Ribeiro Artistry - go and follow her Instagram and be inspired! @natasha_ribeiro_makeup) and Centaine of glossco (glossco.com.au). Two amazing beauty babes to check out ASAP if you're serious about anything and everything beauty.

Between livin' the dream and plain livin', I went back and completed my Honours year of study in Ancient Worlds (ancient civilisations, Greece and Rome, and Egypt and Mesopotamia) and experienced one of the most intense love/hate relationships between myself and the written word, in the form of my thesis. My brain baby/bane of my existence. Graduating this week and Imma need y'all to cross your fingers and hope I don't trip up, OR down the stage stairs.

Aaaaaannd that is it! Please come back and visit these next twelve days, I promise I've put in the best beauty bits, lots of pictures, and as many puns as one human is allowed to get away with in a singular blog post. 

Tweet tweet xx


Step into Spring: New Skincare & Beauty Loves

Hello my little birds!
Let's not talk about the fact it's almost the end of November and I'm convinced some cosmic giant pressed the 'fast forward' button on 2015 haha - instead, let's talk about SPRING, because it has indeed sprung, and it's gorgeous thus far! Trends including crisp whites, co-ord sets, full brows, coral lips, and of course, Spring Racing colour and florals are making me all kinds of excited for the Spring/Summer season ahead.


So in keeping with the whole, spring-is-a-new-season-ergo-I-need-to-get-new-things vibe, I thought I'd give a little update on my skincare routine, and what I'm loving colour-wise as we move into warmer weather (YAY! SUMMER!)

actual footage of yours truly in summer

SKINCARE

Now you long-time sparrows will notice a couple of old favourites in this photo, and some newbies. My faithful Cetaphil SPF 50+ Daily Moisturiser took a back seat during Autumn/Winter this year, but as the mercury creeps up and the days grow longer, I'll definitely be reaching for my 50+. I'm going to attempt to NOT get sunburnt this summer, and whilst I know the likelihood of that succeeding is low, I'm hoping with a little help from some wonderful SPF+ friends I can make it!

Speaking of SPF, my current moisturising duo tick that little box too. The two Clinique jars with green lids are from the Youth Surge range, designed for dry/combination skin. Whilst my skin has behaved fairly well these last few months, exposure to artificial air and heating has dried it out something shocking. I picked these babies out of Mumma Sparrow's stash (sorry Mum) and I've found them to be really effective. The day cream contains SPF 15+, perfect for overcast, wintry days, and the night cream is buttery and feels luxurious on the skin. I don't know if I'll repurchase this duo in future, simply because there are so many products I'm wanting to try and experiment with. I think around this time next year though, if my skin is again feeling damaged and dried out, I'll definitely come back to them. 

The Garnier Gentle Cleansing Milk has also become a fast friend of my poor, dried out skin. I often use this as my 'second step' following a trusty Johnson's make-up wipe. Whilst wipes aren't the best thing in the world for your skin, I find they remove a majority of that 'top layer' make-up that usually comes off quite easily. The Cleansing Milk, with cotton pads, is great for getting rid of the stuff you maybe can't see. I also find it really gentle to use on the eye area, and very effective at removing waterproof/eye make-up. Whilst the idea is that you can leave your skin after using the milk (as it's also a moisturiser on its own), I'll often follow this with my Swisse Cream Cleanser, because as nourishing and luxurious as the milk is, it can feel a little heavy if I leave it on my face. 

Lately when I feel like I need a good, deep cleanse, or I want to do something a little more relaxing and ritualistic at the end of the day, I've been turning to the Eve Lom cleanser. THIS STUFF IS AMAZING. Eve Lom is a facialist, honing her craft in L.A., and created the balm for clients who wanted the same effective cleanse and treatment at home, between facial appointments. The balm is a cleanser, an exfoliant (when used with the accompanying muslin cloth), and a moisturiser, if you choose. For starters it smells incredible, so right off the bat you receive aroma therapeutic benefits. Following the instructions included with the pack, I found it easy to give myself a facial massage, which felt incredible. Even more exciting, it removes make-up so, so easily and quickly, including eye make-up. Unlike the Garnier milk, the balm doesn't feel heavy on the face. Out of habit I'll still rinse after cleansing, but I could leave the balm and just not moisturise, if I wanted to. A really, really beautiful product that I highly recommend for anyone looking for a more pampering, relaxing way to effectively cleanse x

Last but not least, primers! Yay! I recently re-purchased the Hourglass Mineral Veil Primer, with SPF 15+ and I've fallen in love with it all over again. It feels like silk on the skin, and causes make-up to become water resistant, something that I know I'll really appreciate when those sticky, hot summer days come around. I've also been using the Too Faced Shadow Insurance eye make-up primer, and again, it feels so silky and wonderful on my eyelids, as well as preventing my shadows from creasing or fading. and evens out skin tones as well. 


COLOUR

First things first (I'm the realest), I know there's a lot of Nars happening in the above image. After having such amazing success with Sheer Glow, however, I felt I should give a few more products a try, and it's been terrible because now I love them and I'm never going to be able to NOT have them in my kit because I love them infinite amounts!

Above I've included my Soft Velvet Loose powder in Eden, the Eye shadow Duo in Portobello, and the Velvet Matte Lip Pencil in Mysterious Red (swatches below). I find the powder perfectly compliments my Sheer Glow shade, Mont Blanc, as well as perfectly setting my T-zone for a full day's wear; it mattifyes without adding pigment, which is so wonderful because I adore my colour match. 
The Portobello duo contains a mushroom-like brown, and an almost-nude taupe shade, which are wonderful for creating a basic day look, but can be blended and smoked out for something a little more intense when going out. 
Finally, the Velvet Matte Lip Pencil in Mysterious Red has toppled my favourite red lipstick of all time (Bombshell by Sportsgirl). It creates the perfect red lip, every time, without fail, and is long-wearing without flaking. An incredible red, and something I'd recommend to anyone wanting to attempt a red lip, but feeling unsure. 

Now my Mecca Cosmetica To Save Face should technically be in with my skincare, but the amount of time, care and thought put into the Mecca Cosmetica range means I'll count it in with my colour. Containing SPF 30+, I find this moisturiser a happy medium between my Clinique Youth Surge, and my Cetaphil 50+. Whilst it provides a higher level of protection than Clinique, it feels less sunscreen-like, and far less heavy than my Cetaphil. Also, as I use this as a base under my primer and foundation, I feel like it counts as make-up... sort of... not really... but I think we agree it looks good in the photo...? Hehe

 Two new picks from Stila have made their way into my collection, the CC Cream and the Convertible Colour in Gerbra. 

The CC cream is colour correcting, as well as providing hydration and brightening effects to the skin. It does come out of the tube green, but quickly adjusts to your skin tone, providing a more natural colour-match, with a radiant finish. A new go-to for days off, this stuff is foolproof, and definitely worth a try if you're looking for something user friendly!

The Convertible Colours have long been a Stila fave and staple for many the beauty junkie, and for good reason, In that little compact is your lip and cheek colour, and they're super blendable, so it's easy to achieve a hint of colour, or a full-blown natural glow. My chosen shade, Gerbra, is what Nina wears in Offspring (for any of you fellow fans out there!). Again, so user-friendly and foolproof it's not funny, this convertible cream is perfect for day-off chill, and work-day madness! 

Now, as promised... swatches!


NARS Portobello - L is the nude/taupe, R is the mushroom brown


Stila CC Cream - goes on green, blends and adapts effortlessly to the skin! Easy as!

To the right - Gerbra, so beautiful and peachy!
To her left - on the bottom is a swatch from a NARS blush tester, in Deep Throat
Above left - another NARS tester, the Liquid Illuminator in Super Orgasm

NARS Mysterious Red - mysterious because it's a mystery why this doesn't have its own cult following, seriously guys, GET ON IT


That's all for now my little birds, stay tuned for how NOT to contour and strobe! 

Until next time,
Tweet tweet xx


Cleaning My Make-Up Brushes: Lilo and Stitch

Tonight I cleaned my make-up brushes and I feel like the only way I can express this to all you little birds is through GIFs of Lilo and Stitch.


STARTING OFF
heck yeah! Cleaning my brushes!


FIRST BRUSH IN
washing out AAAAAALLLL of the make-up and seeing how much there is... ew


SECOND BRUSH IN
Aaaaand that's my lower back that's hurting 

ya' know, from bending over the sink and squeezing all the soap and goop from the bristles


HALF WAY!
Why did I start this? Why why why?

Internet/Fellow Beauty Bloggers/Experts/By the Book People:
"Because your dirty brushes gather bacteria and it's important you clean them!"
Me:


Parents walk past bathroom twenty minutes in and ask what you're doing... And you tell them... And they respond accordingly


When you're finally up to cleaning your shadow brushes and realise it's nearly finished

Finally being finished! And they're all clean and drying and done!


..... but you realise you have to do it all over again in 1-2 weeks' time...


And that's how I wash my make-up brushes!

Tweet tweet xx


I HAD AN ALLERGIC REACTION AND IT SUCKED

Pretty self explanatory title, right?

Here's what happened - Napoleon Perdis make-up artists came into my workplace and offered all of the staff make overs. I'm serious! I thought they were joking too, I waited for the catch but... there wasn't one! I was SO excited, you have no idea, I've been desperate for a lovely make-up session, and I was hoping to learn, finally, how to contour like a boss.

So I ran from work when I clocked off, hopped up into the chair, and was practically bouncing at the thought of having my make-up done professionally. I'm a major nerd, so I was SO ready to learn some new tips and tricks. One of my favourite make-up artists (who has done my make-up for a few events) was trained by Napoleon Perdis, so I've always had respect for the brand and the training.

The lovely girls helped me take off my work make-up, and used a cleansing oil all over my face which was actually quite scary - evidently, ONE make-up wipe doesn't remove my whole face. NOT EVEN CLOSE. So I'm going to be looking into some new cleansing methods, folks.

Then my lovely make-up artist applied a primer and we got to chatting. She applied my mascara first, as Napoleon believes it not only gives the formula time to dry, but it means you definitely get time for a second coat. Now I like to do my mascara next-to-last, simply because I do it whilst my foundation sets, before I use a setting powder. But I thought hey, ok, let's see how this method goes.

Now my eyes are NOTORIOUS for FLIPPING THE FREAK OUT the minute ANYONE but me tries to use ANY sort of eye product on them. You can imagine the struggle for Mumma Sparrow back when I did dancing, and eyeliner was a mandatory part of costume. Essentially my eyes turn into Niagara Falls and water all over the place, meaning you have to work super quick to get liner/mascara/falsies on before whatever shadow work is messed up. So when my eyes DID begin to water, on cue, I didn't think much of it.

My lovely make up artist talked me through the products she was using, explaining their benefits and qualities. Were my eyes stinging a tiny bit? Yeah, maybe, but I put that down to them settling from the whole, someone-other-than-me-doing-make-up-thing. Then we got to the good bit, the contouring! I realised that my main problem with contouring is I do stripes rather than swipes, if that makes sense? Rather than buffing and creating ROUND shapes on my face, I do rather sharp, 80's-style diagonal lines, and that's not a good look folks, not at all.

She then used an eyeshadow as a liner (a technique I love myself) to create a softer, natural look, and again, eyes watering, unhappy with me, but again, I ignored it. She applied another coat of mascara. Then she set my look, and I ended up buying a mini-kit with the contour trio and primer (because my Nude Airbrush Mineral primer had run out that very day), and went back to work to show my girlfriends.

The minute I walked in everyone asked if I'd been crying, and if I was all right. And, yeah, my eyes were watering and a bit stingy, but I thought they were still just settling. As I was chatting to a couple of the girls, that stinging turned into a real irritation, they hadn't stopped watering, and I was starting to feel quite hot. I cracked and used a Johnsons' make-up wipe to start taking off my eye make-up, figuring once it was off I'd just fix my face with my own Australis powder and be off to dinner.

I WAS WRONG.


My eyes went into a full-blown allergic reaction, and I had to detour from dinner and instead go to a chemist, who was very lovely but very concerned. She recommended I wash my eyes out thoroughly and use eye drops to calm the irritation, and keep taking Telfast (which I'd been taking already for a cold/hayfever situation). The eye drops worked pretty quickly, considering, and even though they still hurt like hell, my eyes stopped watering and started to clear slightly.


I pretty much went home and went straight to bed, hoping by morning I'd be back to normal.
Welp. I was, and I wasn't.

My eyes were A LOT better when I woke up, but they were a bit gummy, very puffy, and still quite sore. Also, that cold/hayfever thing? Yeah, that had reared its ugly head overnight and left me with NO VOICE. So unfortunately I had to call in sick to work, but I'm glad I gave myself time to recover properly.

When I returned to work the following day, my colleagues, who had seen me after the session, said I did look a lot better, but my eyes were still quite puffy.

I have NEVER in my life had an allergic reaction like that to a mascara or eyeliner. EVER. I couldn't believe it, I was so shocked, and it was honestly a little frightening. I haven't been back to Napoleon Perdis yet to tell them about my reaction, simply because I haven't had time, but I will, just in case it helps them with future clients. I'm not mad at anyone or upset with the brand, if even I didn't know I was allergic to something, how could they? I've been going through the ingredients of the NP mascara versus those of my favourite mascaras, and so far I think it might be either the rice bran extract or the bamboo leaf extract that set me off. Apparently in this case, natural ingredients weren't the right choice!

The lesson here is:
If a product (especially an eye product) begins to sting, irritate, or make your eyes water (more than normal), TELL YOUR ARTIST IMMEDIATELY. Who knows, if I'd mentioned it earlier, she could've switched mascaras, or at least taken it off, which may have lessened the severity of my reaction. I know I'm very lucky it wasn't any worse, especially considering how sensitive the eye area is. I also think I was just too excited to be thinking clearly!

If you want to see a photo of how my reaction played out, visit beautybyasparrow on Instagram, or look for the tag - #beautybyasparrow. (I thought I'd leave it there rather than repeating it and making you all see the redness and horror).

Until next time my little birds,
check your make up ingredients!

Tweet tweet xx


Grow baby, grow!


Hello my little birds!
So I've started a process that I want to blog about and share with you, simply because in my own research and YouTubing I haven't found a clear, billboard like, HUGE sign saying "YES THIS WORKS" or "NO IT DOESN'T". I've only really found "SORT-OFs" and "FOR ME, YES". 

It's called the Inversion Method and I'll admit, when I first read about it I was a little sceptical, and scared. Oil? In my hair? But oil make grease? Greasy hair bad? How...? Then I watched this little clip on YouTube by Evin Yalcin and heard that you actually don't have to use oil, but you can rely on your hair's natural oils instead. I find my hair can get quite greasy on its own, so the idea of putting more oil in there isn't very appealing. 
Essentially you flip your hair upside down, looking down, and give yourself a scalp massage for four minutes. At first I was a bit half-hearted, I mean, standing with your head almost between your legs rubbing your head isn't a daily activity, you know? But then I remembered something about myself -
I LIKE MASSAGES. 

So even if this method doesn't end up working for me, I'm getting a lovely mini-massage each night, and I'm ok with that! 


The reason I want to grow my hair out is two fold. For starters, at the moment it doesn't feel entirely healthy - my ends are splitting, I know I've done too much in terms of colour and bleach to it this year already, and it's just a bit of a hot mess to deal with.
Also, I'll admit, I haven't totally gotten over my love, my obsession... the chocolate brown hair.
I mean the gloss, the depth, the shine, how healthy it looks.... ah!
I already know, however, that I can't do another thing to my hair colour-wise until it's healthy again, and I was considering lobbing it all off, but that won't really repair any of the damage I've done. Also, I don't want short hair! As much as I adore a bob/lob, I know they don't really work for me. I'd feel silly chopping it all off since I've been growing it since August last year. 

 
On the left is my hair circa 2013, when it was still mostly blonde and the longest I can remember it being. On the right is my lob from August 2014. I did love my lob, and at the time it was exactly the style I needed, but it's taken a long time to grow out.

I've been looking up home remedies and other solutions for growing long, beautiful hair, and I've discovered three main themes.

1) OILS & PRODUCTS
2) FOOD
3) WATER


OILS & PRODUCTS
Obviously everything you put on your hair will affect it, its growth, and its strength and condition. I've spoken in the past about using John Frieda products to protect my colour, but I haven't been taking good enough care of my scalp. That's right folks, dandruff. Ick, I know, but it has to be said, and it's one of the main downsides to colouring your hair - a dry, flaky scalp will often ensue. Whilst various shampoos, including caffeine and coconut milk shampoos, are suggested for stimulating growth, I feel I need to get my dandruff situation under control first. Which leads us to oils! Aside from the inversion method, all of my favourite YouTubers rave about coconut oil and its benefits for your hair. Recently Kayley Melissa spoke about using coconut oil as a scalp treatment for conditioner, and said that it was far more effective than any other shampoo she'd used. Other top rated oils include Argon Moroccan oil, jojoba oil, rosemary oil, olive oil, and other essential oils too.

FOOD
You are what you eat, and to get healthy, beautiful hair, as well as healthy, beautiful skin and internal organs (woo! internal organs!), a diet full of rich, nutritious foods and proteins is highly recommended. Eggs, avocado, fish, fresh fruits, and vegetables, are all vital to growing strong hair. I'll admit, my diet is in desperate need of an overhaul (one too many coffees and cakes I'm afraid), so I've already been moving to these changes anyway for my own health. Now as an added bonus, I'll have beautiful hair to boot! A lot of beauty bloggers and YouTubers also recommend taking a multivitamin or hair supplement to boost growth, but I want to try adjusting my diet first before I start adding in any sort of extra pills or potions.

WATER
Water. Water, water, water. Seriously. The human body can't do jack without it. It's important for fostering hair growth as well as cell renewal and all those other lovely things our bodies do for us to you know, keep us alive. The human body is 70% water! It's so important to hydrate, and being exposed to fake air and heavy indoor heating has really taken its toll on not just my hair, but my skin and general health as well. A good tip I find is to keep a bottle of water with/near me at all times. Even just watching TV, working, or blogging, if I have water near me, I'll drink it without even thinking about it. Before you know it you'll have downed your 8 glasses (or 2 litres) without even realising!
Tea is also a good way to get water into your system, and a great idea for winter time when drinking cold water is super unappealing.

So here we are - I've been using the Inversion Method for three days now (it's Monday), so I'll be back on the blog this Saturday to give you my results. An inch to four inches in a week? My hopes aren't high, little birds, but I am a bit of an optimist. Make sure you're following beautybyasparrow on Instagram for updates and inspo!

Until next time,
Tweet twee xx

Finding a Foundation: Bare Minerals

Hello my little birds!

I have been FLAT OUT these last two weeks, barely had enough time to ruffle my feathers back into shape!

This week I decided I would FINALLY get around to trying a few foundation samples I've accumulated this year. Aside from the fact I've still yet to get to Inglot to grab my YSM (CAN'T WAIT SO EXCITED AHHH), my Bobbi Brown is (finally! Wow!) running out and I really need a new foundation that will last for work, play and even the little rests I get in between


L-R: Clinique Anti-Blemish Solution, bareMinerals BARESKIN, L'Oreal Tru Match, Revlon Colour Stay

Right off the bat, none of these foundations are the right colour for me. I'm painfully aware of how freakin' pale I am (which will become that touch more obvious over the next few paragraphs), however most foundation samples you receive come in the warm neutral/beige variety, so there's no room for being fussy. So whilst colour is irrelevant, the main thing I'm looking at in these samples are three factors 

FORMULA 
Is the liquid sticky? Creamy? Bubbly? Watery? Weird?
FEEL
How does it go on? Smooth, easy like paint? Sticky and claggy like glue? Patchy? Greasy? Dry?
FINISH
Once it's all on, buffed, smoothed, set, how does it actually look on? Colour aside, of course haha!

First up was bareMinerals Bareskin foundation, a sample from the wonderful Mecca Maxima.
The description reads
"bareSkin liquid mineral foundation has a built in brightening serum packed with Vitamin C so that skin looks luminous at all times. This foundation creates a seamless natural effect with adjustable coverage, so that the perfect amount can be applied. Lightweight in texture, this hypoallergenic foundation it formulated without oil, silicone, parabens or fragrance so it is suited to all skin types. Beautiful bright natural foundation is only one step away."

I opened the packet and immediately realised how off the colour was, for me. 

There appeared to be enough in the sample for one full face of make-up. I used my Real Techniques Expert Face Brush , however BareMinerals released a patented brush specifically for this formula which you can see here. Now whether using their brush would have had a different effect, I'm not entirely sure, but from my experience I found one or two big issues. 

FORMULA
The foundation was bubbly and seemed a tad watery; I was worried it'd dribble off the foil and onto my lap. The idea of the brush is that you directly pour the liquid foundation into the bowl-part of the brush, so that would explain its consistency. 
FEEL
Ooh. Ooh that was nice. Like brushing silk all over your face! So, so soft, so smooth, gorgeous texture, lovely to buff on. 
FINISH
DEWY. SO, SO DEWY. 

You can see how shiny this foundation is on my nose and chin alone. Look at that sheen! I'm not entirely sure why youthful make-up is associated with dewy, wet finishes. In my experience, if young skin is dewy or shiny, it's about to break out HARD. I figured that using a powder (my Rimmel of course) would counter-act the dewy-ness, but I was wrong. 

You can see above that the sheen has died down a little, but it's still quite shiny around the mouth and chin, and along my cheekbones. I couldn't quite believe how bad the colour match was - sometimes neutral/beige colours can be negotiated with to suit my face, however, this shade was all kinds of wrong. The foundation also felt weighty on my face - no where near as heavy as my longwear foundations, but I COULD feel it, and that says enough in itself. I quickly took this foundation off immediately after application, and beneath I could see my skin beginning to grow red. I didn't pay that much attention, simply because my skin is sensitive and reacts to new products the same way some two year olds react to green vegetables. 

Overall, whilst the foundation felt nice going on, it didn't look nice overall, and I already know how my skin reacts to dewy formulations - pimples, pimples, pimples. Oh, and pimples. 

A solid 6/10, but alas, no winner here!

I'll keep you all posted as I go through my other samples these next few weeks 

Until next time,
Tweet tweet x
P. S. I'm now taking requests! Fed up with foundation? Sick of skin care? Had enough of hair? Comment and let me know what you'd like me to look at, try, review and share on the blog! xx


AContour Review: I'm sad!

Ughhh I hate to write a bad review

Not that this is a bad review, as I'll explain below I don't think this is necessarily a bad product, for a lot of different reasons, but I need to be honest, even if it does make me feel bad!

From the get-go I need to emphasise how much I LOVE Australis cosmetics, from their ethos, to their packaging, to the fact they're Australian made and owned, down to their colour variety and price point... Ah so much love!

Alas, the AContour palette didn't stir up quite the same feelings in my heart of hearts.


The packaging is typical Australis black and pink, sleek and exciting. I was so, so happy to find this in BULK at Priceline I can't even begin to tell you, and down to $16.50 from a cool $20? Score!
Australis themselves say; 
"Define your features and shape like a pro with these six powders designed to contour and highlight the face, taking your daily make up routine next level! This palette is formulated to provide a natural, healthy glow for any skin tone offering a contouring trio and a highlighting trio."

A cool concept, and one I was very eager to try out. The palette is made up of six shades, three light, and three dark. My first attempts had me choosing the VERY wrong shade and having to do some damage control with a make-up wipe. The trios are powders, which I'll admit did surprise me, because for whatever reason I thought it was a creme palette. 

Ah, brand new make up, how I love thee! 

I've been using shade six to create shadow, and shade two for highlighting. Below are swatches on my arm in both natural light and shadow to give you an idea of what they look like against my skin tone. 
 

The powders are extremely pigmented. Holy sh*zballs, are they pigmented. That saying, less is more? Well almost-nothing is more with these bad boys. Buffing has become my technique of choice when using this palette, as unless you've buffed, you have a very zebra-line-ish looking face.

Which brings me to the pros and cons of this palette.
I wouldn't say it's a bad product - the quality is excellent, and up to the high standards I've come to expect from Australis products. Vegan friendly, make-up bag sized, aesthetically pleasing, compact and cute. The powders haven't upset my skin which is a miracle on its own, and I can absolutely see why so many bloggers and YouTubers have fallen in love. It's handy - you've literally got all the shades you could need for any skin tone, and there's even a little how-to on the back in case you're unsure.

That's my face with some AContour powders happening - look at my nose in particular!

THE PROS
Easy to use, nice size, sleek packaging, and I can imagine that when I have a bit of a fake tan happening and a slightly darker foundation, the shades would absolutely help me in my contouring. I also think that for a function, or an event, where make-up can be that little bit heavier, these powders would be a godsend. Great for dancers, and performers; for clubbing, and for formals and socials, where there will be more dramatic lighting and a greater need for sculpting and highlighting, I would absolutely be reaching for this palette!

THE CONS
Remember the whole, extreme-pigment-and-buffing thing? Does anyone really have a spare ten minutes in their make-up routine to be doing that extra legwork? I know sometimes I don't, and the great thing about my Maybelline Dream Sun bronzer is that I literally whack on a little bit and it does the job. The AContour powders need that touch more effort and technique, to stop them from looking garish and, dare I say, drag queen-esque? I'm all for a glam contour and Kardashian-esque sculpting, but I can't be sitting in front of my mirror buffing and negotiating with powders every morning. I got stuff to do, people to see, places to go!
Speaking of places to go, as much as I'd like to say I have a full, busy, buzzing, and fabulous social calender, I really only go out maybe twice a month, and only one of those things will be a formal/dramatically lit event. Realistically, that greater need for highlighting and sculpting would only really come around three, maybe four times a year for me (seriously guys I have no life).
Now in summer I do tend to rock a fake tan, and have a bit more of a social life happening, so I can sort of foresee myself LOVING this palette in spring/summer 2016, when I'll need to look my selfie/photo best. For now though? Again, maybe three, four times this autumn/winter I'll need a heavily contoured look, at most.
The other thing about a cream palette, or cream-based products (such as the Maybelline FITme sticks) is that they're buildable. Whilst I love that Australis have delivered a strong, pigmented and good quality powder, for me, it doesn't leave a heap of wriggle room. I don't find the powders to be buildable, and as I said, having to buff a colour down to match your foundation/skin tone is a lot of extra work in the mornings.

Bottom line - this is NOT a bad product, it does as it promises, and it doesn't upset my skin or ruin my make-up. That being said, I expected to love and be wowed by the palette, and that hasn't happened either. I honestly think a cream-based palette, or a good, stick foundation with a light concealer works better as a contouring kit than six shades (most of which this pale whale can't even use).

What do you think, little birds? Used the palette and love it? Swear by it? Hate me for even uttering a bad word against it? Please let me know in the comments!

Until next time,
Tweet tweet xx